

Leider nicht in Deutsch geschrieben, aber die fotos erklären alles...
[Blockierte Grafik: http://edelweiss.smugmug.com/photos/148883087_juvRT-L-1.jpg]
Einfach und elegant...
Since I recently bought myself a new Garmin GPS, I thought it was about time that I install a dedicated mount instead of using Velcro strapping to hold my GPS to the crossbar pad.
I didn't like the RAM ball mounting options offered by RAM, so I came up with my own solution. What you see is a modified RAM-B-236 ball installed atop the BMW threaded bushing that holds down the BMW handguard.
[Blockierte Grafik: http://img206.imageshack.us/img206/1044/ramb236installedweb0tr.jpg]
The following describes the simple steps required for this installation.
The BMW threaded bushing after it was modified. It was removed by unscrewing the T-30 fastener (6 mm) from the underside of the BMW handguard. The minor diameter of an M6 x 1.00 fastener is 5 mm, but I used an M4 drill bit to drill the pilot hole the remainder of the way through the threaded bushing so as not to shave any material off the existing threads. It was then finish drilled using an M5 drill bit, the size required for an M6 x 1.00 tap.
[Blockierte Grafik: http://img117.imageshack.us/img117/7159/bmwthreadedbushingweb0sg.jpg]
The RAM-B-236 ball with 3/8" - 16 thread post as received from RAM.
[Blockierte Grafik: http://img164.imageshack.us/img164/8751/ramb236original4su.jpg]
The modified RAM-B-236 ball after the 3/8" - 16 threaded post was cut off, filed flush with the flange, lapped on wet sandpaper and then center punched, drilled and tapped for an M6 x 1.00 threaded fastener. 10 mm of threaded length is adequate.
[Blockierte Grafik: http://img164.imageshack.us/img164/9356/ramb236balltappedweb7ma.jpg]
The modified RAM-B-236 ball with an M6 x 1.00 stud installed. Loctite 242 was used on the stud. The exposed threaded length should be no more than 9 mm long so that it doesn't bottom out against the existing fastener that is screwed into the BMW threaded bushing from the bottom.
[Blockierte Grafik: http://img117.imageshack.us/img117/9917/ramb236ballstudweb9pa.jpg]
Additional notes:
The BMW threaded bushing comes "keyed" so that it doesn't rotate during installation. See the photo of the modified threaded bushing and you'll notice one of the two "flats".
The T-30, M6 x 1.00 BMW fastener that screws into the BMW threaded bushing from the bottom was originally coated with Loctite 242 (blue). The threads were cleaned and Loctite 242 was re-applied prior to re-assembly.
When screwing the modified RAM-B-236 ball with stud into the BMW threaded bushing, Loctite 242 (medium strength) should be used. Should any torque be applied to the RAM ball, then Loctite 270 (permanent strength) should be used at both ends of the modified RAM-B-236 stud.
In any case, be it a GPS, camera or whatever, I use a tether as a back-up.
A nylon washer was installed between the RAM-B-236 ball and the BMW threaded bushing; visible in the first photo.
The finished product is elegant looking due to the lack of the usual bracketry employed when installing a RAM ball.
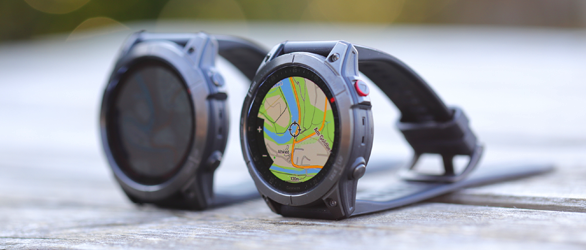
Garmin fenix 7X und epix Gen 2 im Test
Der Schwerpunkt dieses Tests und Vergleichs der Garmin Fenix 7X Solar und Garmin Epix Gen 2 liegt auf den Sensoren wie Höhenmesser, Positionsbestimmung und Herzfrequenz. Was unterscheidet die beiden GPS-Outdoor-Smartwatches? Und wie gut ist die Taschenlampe der Fenix 7X für den Outdoorbereich?
Hier geht es zum Test der Outdoor-Smartwatches ...